Posted 6/5/2012
Here are some important guidelines to help you grow the best annuals ever:
- Prepare the soil by cleaning out all the weeds and adding organic matter.
- Purchase annuals without flowers so that you can enjoy the blooms longer. Choose shorter bushy plants because the larger ones are more established already and may not transplant as well. If you do buy plants that have flowers already, pinch them off to encourage the plant to develop good roots first. Pinching out the first flowers will also result in bushier plants.
- A dark green color is generally a good indicator of a strong healthy plant. (Make sure that they are not light colored or yellowing. Nor should they have brown patches)
- Plant to the depth they were in the six packs and water them in thoroughly. Go back the next day and water again. Do not rush to plant them outside, wait until the night time temperatures are in the 50Fs. Remember that our last frost date in Fulton County is around the last week in May. Cool weather annuals such as alyssum and pansies can be set out earlier but impatiens will sulk if put out too soon and they may not recover.
- Keep up with watering, plants usually need about one inch of water a week but those in containers may need to be watered daily or even more than once a day.
- In early summer as the plants start forming flower buds begin a fertilizer program using a balanced formula such as 10-10-10. Read the label and apply as the manufacturer suggests throughout the summer and early fall. If you have some annuals that are slow to flower use a formula such as a 15-30-15 to stimulate flower production.
- In midsummer annuals with lots of tiny flowers such as alyssum start to look a little ragged and they will benefit from being cut back by a third to a half. Use this technique for alyssum, coreopsis, bachelor’s button, snapdragons and sweet William. Give them a dose of liquid fertilizer and they will set new buds very quickly. If your petunias are starting to get leggy with blooms just at the ends try cutting them back by half, they will also set out new growth and flowers and you will have a more compact plant full of flowers in no time.
- Deadhead your plants. Although there are annuals that are self-cleaning (begonias and calibrachoas for example) most will bloom better if you take off the dead flowers regularly. Pinch by hand or use sharp scissors or pruners and remove all the stem to keep the plant looking tidy.
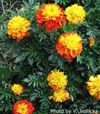
- Towards the end of summer let some of your plants go to seed. Cut off the dead zinnia, marigold and gazania flowers and store them in a paper bag to reseed next year. If they are hybrid plants they may not come true to the parent but flowers are welcome in all colors and sizes – and the butterflies love them. Let the seeds of cosmos fall to the ground where they will sprout next year.
Posted 6/1/2012
by Master Gardener Barbara Henry

June is the time you want to give some thought to winter care for your beautiful amaryllis bulbs. Mine have spent the summer in my outdoor containers where the strap like leaves provide a nice vertical accent and it’s also where I remember to fertilize them. Containers need lots of fertilizer throughout the summer and amaryllis bulbs need lots of fertilizer to feed that big bulb for flowers next year. Very often, the bulb will not bloom the second year because it didn’t get enough food to build a new bulb. I’ve been feeding every seven days or so a with very high phosphorus (the middle number) fertilizer and about every 15 days with a general 5-10-5 fertilizer. In between I flush the containers with fresh rain water to prevent any accumulation of salts from all the fertilizer. This may sound like a lot but the bulbs are potted so that I control the amount going to the bulb and the amount going to the rest of the plants in the container. Last year I was given a beautiful spider variety amaryllis that sent up three flower stalks and it’s been my goal this summer to feed it enough so that it will bloom again next year.
Late August is time to put it into a dormancy period. You need to get it as dry as you can so that the roots won’t rot during the sleeping period. I take my pots out of the containers and put them on their side in a sheltered area so they won’t get extra moisture from the dew or a stray raindrop. Keep an eye on the nighttime temperatures though because you don’t want to leave the bulb out when it goes below around 45 degrees F. If necessary, bring it inside to complete the drying process. You will see the leaves turn yellow and wither and you can cut them off. Put the pot in a cool, dim area around 50 degrees for about two months.
Posted 5/30/2012
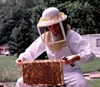
August 11 & 18, 2012
Interested in working with bees? Join the Cornell Master Beekeeper Program for a comprehensive day-long workshop in Ithaca focused on bee hive management – equipment, pests, hive construction, management, and more! For more information, download the info sheet below and also visit the Master Beekeeper site: http://www.masterbeekeeper.org/masterbeekeeper.htm.
Posted 5/30/2012
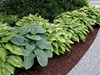
Slugs and Snails
Slugs and snails are nocturnal foragers and are the most common pest of hostas. They eat small round holes in the leaves. By beginning an abatement program early in the spring, slugs may be easier to control. Look for silvery slime trails in garden beds to determine if slugs are present. They may be spotted during daylight hours or in the evening by using a flashlight. Since some plants are more susceptible to slug injury, check around those particular plants to detect slugs. Thin-leafed hostas and those with leaves growing close to the ground are most susceptible to slug injury.
Insects
Black vine weevil adults chew irregular notches on the edges of hosta leaves. The black vine weevil larvae that feed on the crown and roots, however, do the most serious damage; symptoms of injury include yellowing and wilting of foliage.
Foliar nematodes are microscopic-sized worms that can infest hosta leaves. Nematodes overwinter in the ground and move to the leaf where they feed between the veins. The symptom is a brown streak that appears between the veins in late July or August. Foliar nematodes are a new problem, and to date, current research has not found a way to eradicate them.
Deer, Rabbits, Voles, and Squirrels
Deer can eat all your hosta plants in one evening, leaving just the stalks standing.
Rabbits occasionally eat young shoots in the spring, and sometimes bite off flower scapes.
Squirrels will eat hosta leaves during a drought, and sometimes dig up plants. Voles chew on the roots of hostas, and a heavy infestation of voles may kill plants.
Viruses are of concern and are an emerging and important issue in growing hostas. Symptoms include an irregular mottling of the foliage, yellow ringspots, or small yellow dots or flecks on the leaves.
For complete information on each of these, please download the PDF below.
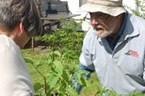
Photo credit: University of Richmond Landscape & Design Program, for educational use only - not to be used for commerical purposes.
Posted 5/24/2012

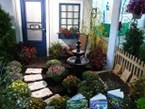
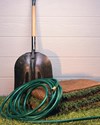
No doubt you’ve heard the term ‘waterwise gardening’ as it applies to water conservation. You might even be using waterwise practices: mulching, irrigating with soaker hoses and drip systems, catching irrigation water in rain barrels and selecting drought tolerant plants. But what about waterwise gardening as it relates to bodies of water? Garden practices that permit fertilizers, pesticides and soil particles to enter water resources and planting invasive species can wreak havoc. Poor gardening practices threaten drinking water supplies. They impact wildlife health and habitat. They destroy recreational opportunities on the water.
Certain landscaping activities, if undertaken near wetlands or bodies of water, may be subject to state and local wetland protection laws. But government regulation is not the only way to safeguard water. You can engage in waterwise gardening practices that benefit water resources such as wetlands, ponds, lakes, streams, rivers, bays and groundwater.
Read more...
Posted 5/15/2012
by Master Gardener Barbara Henry
Toward the middle and end of May we can look forward to moving our seedlings (transplants) outside into their permanent homes.
They do need to be hardened off; otherwise the shock of the outside can kill them. Allow yourself ten days to two weeks before you plan to plant your seedlings outdoors.
The first day, move them outside to a sheltered spot, away from direct sun for about two hours and then bring them back inside. At this stage the plant leaves are very tender and just like our skin when we get the first sun of the summer, they burn easily. Do this for a couple of days, increasing the time to a half-day for two days, exposing them to some direct sun. Do you see any white spots on the leaves? That is a sign of sun or wind burn and you should move them to a more sheltered spot to recover. Continue to water the seedlings, though you want to keep them a little bit more on the dry side.
Every couple of days increase the amount of time they spend outside and in the sun, but bring them back inside at night. Night time temperatures are still too cold and the Mohawk Valley is subject to frosts all the way through the end of the month of May.
After about ten days of gradual exposure to the sun and wind, seedlings should be strong enough to be planted outside. If you are growing plants for containers you can plant them out earlier because if bad weather threatens you can always move the container inside.
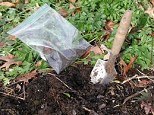
When planting tomatoes, however, wait until your soil temperatures have warmed up before planting. Don’t worry if you don’t plant tomatoes until the first week of June; they will catch up very quickly. Peppers and impatiens dislike cold soil and will sulk if planted out too soon. My raised beds warm up quicker than my other garden beds. To warm them even more I open a black garbage bag and spread it across the bed. I do this about the same time as I start hardening off my seedlings. Try this and you will be surprised just how warm that soil is when you dig in and begin to plant.
Posted 4/24/2012
by Frank Rossi, Department of Horticulture, Cornell University
It’s a sure sign of spring: the robins return and millions of lawn owners head out to apply fertilizer and weed-killers to their lawns – a rite widely known as ‘weed and feed’.
But here’s the problem: early spring probably isn’t the best time for you to fertilize your grass or apply herbicides unless you have a history of weed problems.
Let’s start with the herbicides. Weed and feed products designed for early-spring application usually contain pre-emergent herbicides. They work by preventing weed seeds from sprouting and they can be an effective way to control crabgrass and some broadleaf weeds.
Trouble is, this assumes that you’ve got weed seeds in your soil ready to sprout. If you’ve been using pre-emergent herbicides regularly or otherwise doing a good job of controlling weeds and keeping them from going to seed, you may have exhausted the supply of weed seeds in the soil. If that’s the case, applying pre-emergent herbicides is like clapping your hands to keep the lions away.
Then there’s the fertilizer. It should be mostly nitrogen and I’ll admit that it can really green up the grass in a hurry. But it can also fuel lush top growth at the expense of roots and you want those roots going deep for moisture so the grass can outcompete weeds during the hot, dry summer months to come. That lush top growth also means you’ll need to mow more often and deal with more clippings.
If you’re going to apply fertilizer, Memorial Day and Labor Day are better times to do it and with recent restrictions on phosphorus fertilizer in many areas and the lack of evidence that potassium will improve your lawn in most circumstances, shop around for fertilizers that are all nitrogen.
Other weed and feed products are designed for late-spring application. They contain herbicides designed to kill actively growing broadleaf weeds like dandelions. But if you want to kill broadleaf weeds, these herbicides are much more effective if you apply them in fall. At that time, the weeds are storing up reserves for winter and moving nutrients from the leaves to the roots. They move the herbicide to the roots at the same time, resulting in a better kill.
Unless you weeds are running rampant, try spot spraying them in the fall instead of putting down herbicide over your entire lawn. That’s just one small step you can take for sustainability.
If weed and feed has become a ritual for you, it’s time to break the habit. Try skipping it this year and applying fertilizer and herbicide only if you need them and in separate treatments at the times when they will be most effective.
Mr. Rossi is a turf specialist and associate professor in the Department of Horticulture, Cornell University. His advice targets cool-season grass growing regions in the Northeast but may be applicable in regions with similar growing conditions. April 2011
Posted 4/19/2012
by Frank Rossi, Department of Horticulture, Cornell University

More Spring Tips
- Stay off your lawn until it dries out. Foot traffic on soggy lawns can damage grass and cause soil compaction.
- Rake up surface debris that shades grass. You don’t need to take aggressively.
- Seed thin areas and damaged spots. “Spring is a race for space between grass and weeds.” says Mr. Rossi, “If you can see soil, broadcast and rake in grass seed to fill that space.
- Repair salt damage along sidewalks and driveways. The usual advice is to water thee areas to leach the salt from the soil but if salt damage is severe, the soil will lose its structure and become compacted. ‘You’ll just end up with a big puddle and runoff” says Mr. Rossi. You may need to remove and replace the soil to solve the problem.
- Start mowing. Mr. Rossi usually suggests raising your mower as high as it will go. But on the first mowing, he suggests lowering it slightly. “Topping it off an inch or two shorter will help the soil warm up and encourage early growth”, he notes.
Posted 4/18/2012

Vegetable growers and flower gardeners alike will find quality-stock plants at the annual Master Gardener Plant Sale sponsored by Cornell Cooperative Extension in Fulton and Montgomery Counties. The sale will be held in the parking lot of Udderly Delicious, North Comrie Avenue (State Highway 30A) in Johnstown on Saturday, May 12th, 9:00 a.m. until the plants are essentially sold out.
A wide variety of vegetable bedding plants, including several varieties of tomatoes, annuals and perennial flower plants, and some house plants will be featured in this year’s sale.
Posted 4/17/2012

A class focused on planting and maintaining a home vegetable garden throughout the year is scheduled in mid-May and will be taught by Barbara Henry, a trained Cornell Cooperative Extension master gardener in Fulton & Montgomery Counties.
"Beyond the Basics” will cover such topics as
- when and how to plant
- techniques for small spaces
- raised beds
- taking care of young plants through maturity
- some of the pests and diseases in this area
- harvesting and finishing up the garden
- preparing the garden for winter
The class is designed for those with some experience in gardening, but beginners are welcome to attend. The cost of each class is $5.00, payable at pre-registration.
Two opportunities to attend the class include:
- May 10, 2:00 p.m. at the Canajoharie Library & Arkell Center, Canajoharie
- May 17 at 6:00 p.m. at the Shirley Luck Center, Johnstown.
Registration is required and a minimum number of registrations is required to hold the classes. Call Cornell Cooperative Extension at 518-673-5525 x 101 to register or email fultonmontgomery@cornell.edu.